
The UK’s leading resin flooring specialist
The Epoxy Floor Coating Process Explained: From Prep to Finish
Epoxy floor coating consistently ranks among the most practical and reliable flooring options for commercial and industrial spaces. Few solutions offer the same level of durability and longevity. If you’re weighing up your options for a refurbishment project or new build, let’s walk through every stage of the resin floor installation process – from surface preparation to the final curing – so you know exactly what to expect.
Why Epoxy Flooring Is Popular in Commercial Spaces
Epoxy flooring has earned its reputation as the go-to choice for demanding commercial environments because it delivers on every front: strength, chemical resistance, visual appeal, and ease of maintenance. It forms a seamless, hardwearing surface that can handle forklift traffic, spills, and daily wear and tear. Whether in warehouses, manufacturing plants, showrooms, or food-safe environments, epoxy resin proves to be a reliable long-term investment.
During curing, a chemical reaction occurs between the epoxy resin and hardener, creating a rigid, cross-linked polymer structure that gives epoxy its exceptional strength and durability. For industrial facilities that handle heavy loads or operate around the clock, epoxy’s resilience and impact resistance are invaluable. Epoxy floor coatings also protect against chemical spills, acids, solvents, and other potentially damaging substances that would penetrate and stain standard concrete floors.
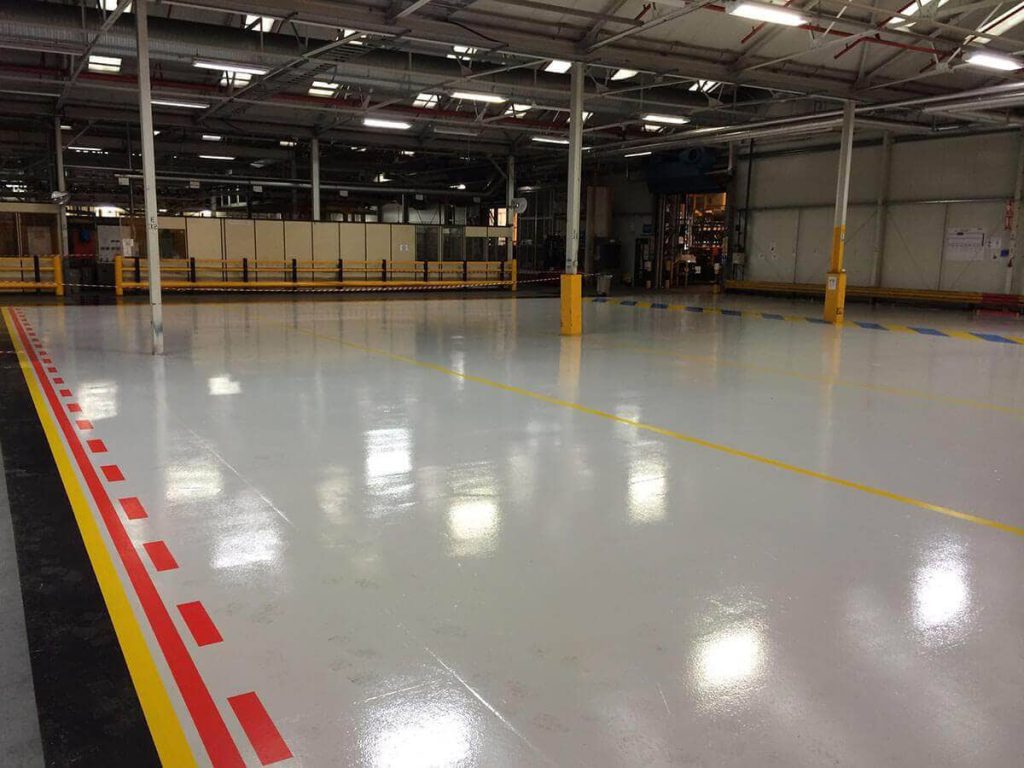
Finally, epoxy coatings for floors are very versatile in design. Available in a range of colours and finishes, from gloss to anti-slip, the epoxy resin finish can incorporate safety markings or branding elements. And with seamless, non-porous surfaces that don’t need waxing or polishing, simple sweeping and mopping is enough to keep your epoxy floor looking its best.
How Epoxy Floor Coating Is Installed
Resin floor installation is a multi-step process that requires specialist expertise, careful attention to detail, and the right environmental conditions. Here’s how it works:
Step 1: Site inspection and assessment
When you work with Impact Flooring, our team will visit your facility to inspect the space and the substrate (usually concrete) and discuss your operational needs. During this inspection, we assess the condition of the substrate to ensure it’s suitable for epoxy application – we look at any previous treatments or coatings, moisture levels, surface damage (e.g., cracks or chips in the concrete), and structural integrity. We’ll also assess the temperature, humidity, and ventilation requirements to ensure optimal curing conditions when the time comes.
Step 2: Substrate surface preparation
The longevity of any industrial floor coating system starts with a solid foundation. The first step will usually involve shot blasting or diamond grinding to remove surface contaminants, laitance, and existing coatings while creating a good starting point for optimal adhesion. The preparation process exposes any cracks or surface damage that needs to be repaired before installation begins. After the repairs, the Impact Flooring team will clean the surface to remove any dust or debris, making sure that the substrate is ready for the next step.
Step 3: Priming the floor
A primer coat helps the epoxy floor coating stick to the concrete by sealing the surface and filling in tiny pores or cracks. It seals the concrete, creating a strong, even base that improves durability. The selection of primer depends on the specific characteristics of the substrate and the intended service environment, i.e., is your facility exposed to hazardous chemicals or excessive moisture?
Step 4: Base coat application
Once the primer has cured, we apply the base coat. This is typically a high-build epoxy resin that forms the bulk of your flooring system. It’s laid out and levelled to the desired thickness. The thickness of the resin floor coating often ranges between 2mm and 4mm for most applications, although this can vary based on traffic load and usage, increasing up to 10mm or more for industrial floors.
Step 5: Optional additives and finishes
Commercial resin flooring systems are pretty versatile and can incorporate anti-slip aggregates for enhanced traction or be customised for aesthetic appeal. Depending on your requirements, demarcation lines, safety markings, and even business branding can be applied.
Step 6: Curing time and final checks
Curing is the final stage of the installation process, and the time it takes depends on the type of epoxy used, ambient temperatures, and the thickness of the coating. Most systems will need between 12 to 48 hours before they can be walked on. Fast-curing epoxy floor coatings, such as methyl methacrylate (MMA), can set in just a few hours. Quality control checks during the curing phase include visual inspection for surface defects, adhesion testing, and verification of proper cure development.
What to Expect During the Process: Timelines & Disruption
The entire epoxy floor coating process can typically be completed within two to five days, depending on the project’s size and complexity. We’ll need to assess the size of the area, the condition of the existing substrate, and any operational constraints (i.e. working around parts of the business that need to continue uninterrupted). Standard commercial installations typically follow predictable schedules that allow for effective planning and coordination, though complicated decorative finishes may require additional time.
At Impact Flooring, we understand that downtime affects your bottom line. That’s why we offer phased commercial resin flooring installations, work outside normal operating hours, and plan meticulously to ensure the process fits around your operations. In many cases, we can work overnight or on weekends to eliminate disruption.
Why Choose Impact Floors for Epoxy Coating Installation?
With decades of experience and a deep understanding of commercial and industrial environments, Impact Flooring delivers high-performance epoxy solutions that last 10-20 years. With an in-house team, we don’t need to rely on subcontractors. We provide fully managed installations, consistent quality, and accountability throughout the flooring process. From site assessment through to final quality assurance checks, your project will be completed to the highest professional standards.
Whether you need a quick turnaround, specialist finishes, or safety-first industrial floor coating solutions, our quality accreditations (including ISO 9001:2000 and ISO 14001:2004) demonstrate our commitment to excellence and industry best practices.
Frequently Asked Questions
How long does it take to install epoxy flooring?
Most installations take between three to five days from start to finish, including surface preparation, application, and curing time. The exact timeline depends on the area size and substrate condition. Rapid-cure options may allow faster return to service.
Can epoxy be applied over existing floors?
Yes, provided the substrate is properly prepared and structurally sound. We’ll assess this during the initial site visit.
How durable is epoxy floor coating?
Epoxy floors resist wear, heavy-duty impact, chemical spills, and moisture ingress, making them ideal for industrial use.
Is epoxy flooring suitable for food or hygiene-sensitive environments?
Yes. Seamless and non-porous, epoxy is easy to clean, and the lack of grout lines or joints prevents bacterial growth.
Can epoxy floors be customised to match our brand?
Absolutely. We offer colour-matching and bespoke finishes that complement your corporate branding.
What’s the difference between epoxy and polyurethane coatings?
Epoxy has superior chemical resistance, making it ideal for areas exposed to chemical spills or heavy impacts. Polyurethane offers better flexibility and UV resistance, so it’s better suited for temperature fluctuations or outdoor exposure.
Contact Impact Flooring today to discuss your specific epoxy flooring project requirements.